看门狗忘记打开问题改善措施

前情提要

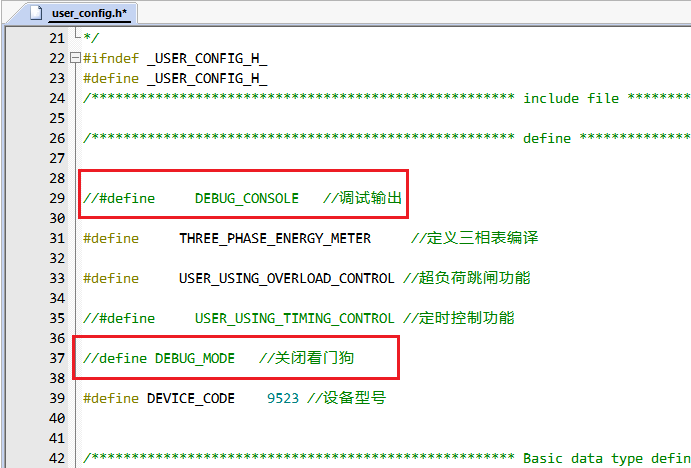
公司产品曾经有出货产品卡死而看门狗不作用的情况,原因是生产使用离线烧录器烧录程序,加上这是一款带电池供电的程序,烧录后一直处于调试模式,看门狗处于关闭状态。因此,后面程序都将调试模式下的看门狗打开。若需要调试时,通过定义宏来关闭看门狗。出货时需要将此宏注释
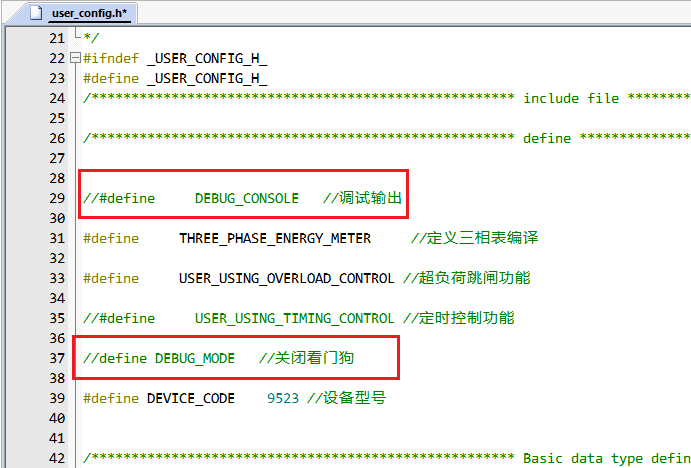
image-20231101094211322

存在问题

在该产品工程中,调试时通常的做法时定义关闭调试看门狗的宏。调试完毕后,若对工程不熟悉,在编译正式文件程序的时候很容易忘记将此宏定义注释掉,从而打开调试看门狗。编译生成的程序文件也无法看出是否已打开了调试看门狗。这样的程序在生产经过离线烧录器烧录后,如果程序出现异常就无法进行复位,有严重的后果

改善措施

  1. 将工程区分为Release版和Debug版,发布程序时在Release版下编译,调试程序时在Debug版下操作
  2. 关闭调试看门狗的宏仅在Debug版下定义,且不再通过手动注释的方式处理
  3. 编译的程序文件根据不同版本生成不同的文件,并对调试程序名称添加明显的调试字样

操作步骤

创建 Target

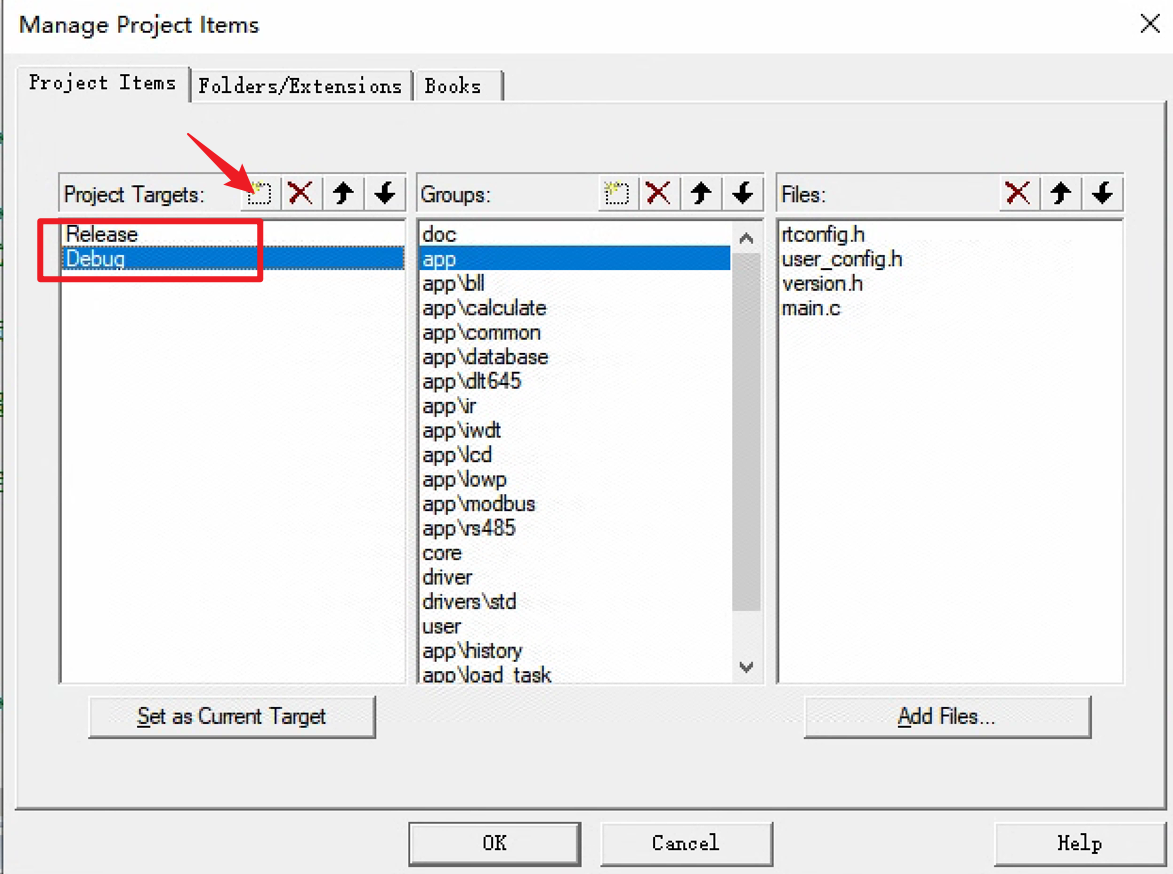
设置两个Target ,分别命名为ReleaseDebug 。不同的Target就是不同的工程配置,如优化、定义、编译、链接等等。

以某个工程为例,在菜单栏中找到Manage Project Items

image-20231101004436498

双击Project Targets组下的目标名称,将工程名称修改为Release,并点击虚线方框添加一项,命名为Debug
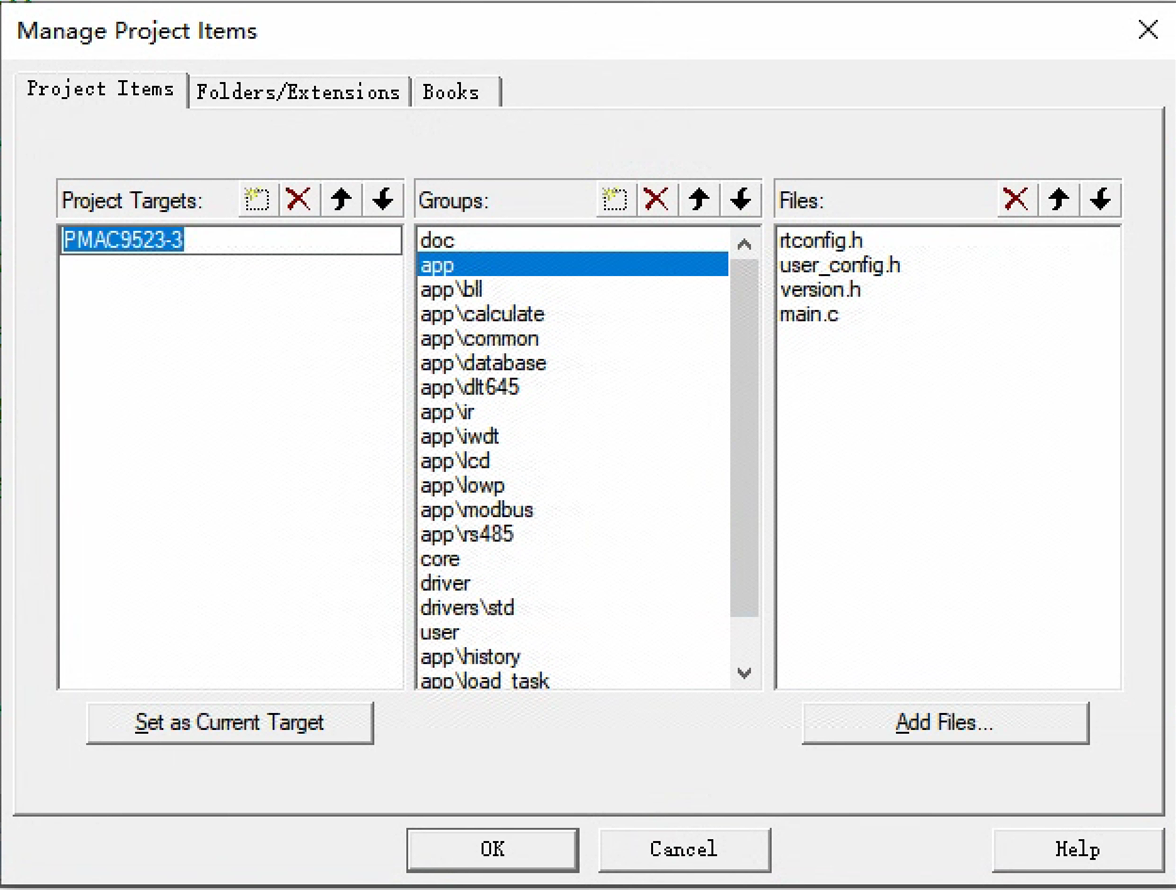
image-20231101004720444

image-20231101005037406

这时候菜单栏就有两个Target可选了image-20231101005123466

Release Target 配置

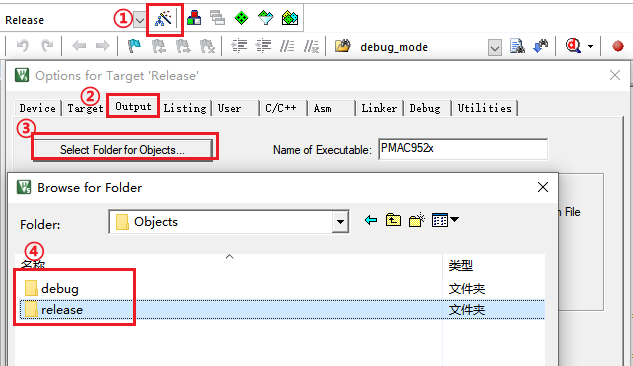
选择Release Target,然后菜单栏中找到 Options for Target -> Output -> Select Folder Objects...

​ 创建releasedebug文件夹,用于区分不同Target下编译的文件

因当前处于Release Target,进入.\Object\release\文件夹后确认image-20231101085114179
选择User -> After Builed/Rebuild -> 输入.\Output\Output_release.bat
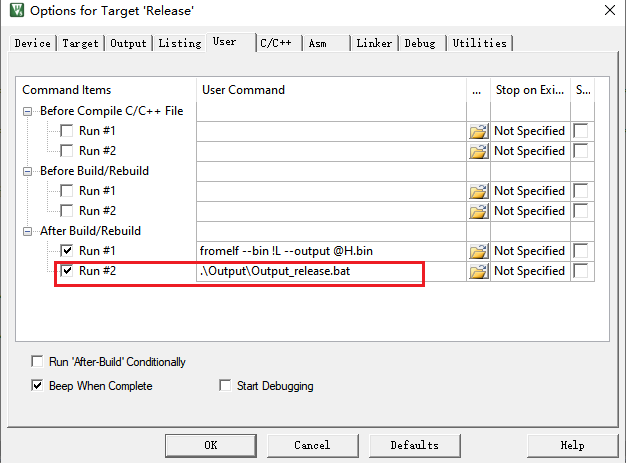
image-20231101090852008

Debug Target 设置

切换到Debug Target,选择Options for Target,操作同上release类似。

进入.\Object\debug\文件夹后确认
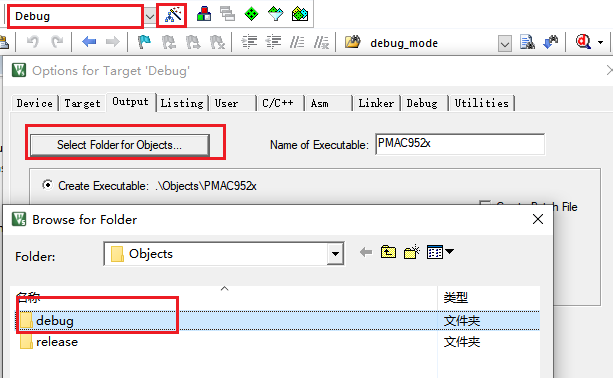
image-20231101091329466

选择User -> After Builed/Rebuild -> 输入.\Output\Output_debug.bat
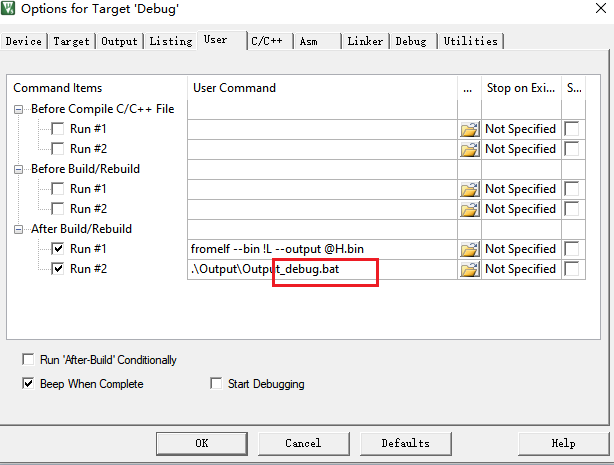
image-20231101091357325

选择C/C++,在Preprocessor Symbols下添加预定义DEBUG_MODE,注意使用英文逗号与其他宏分割
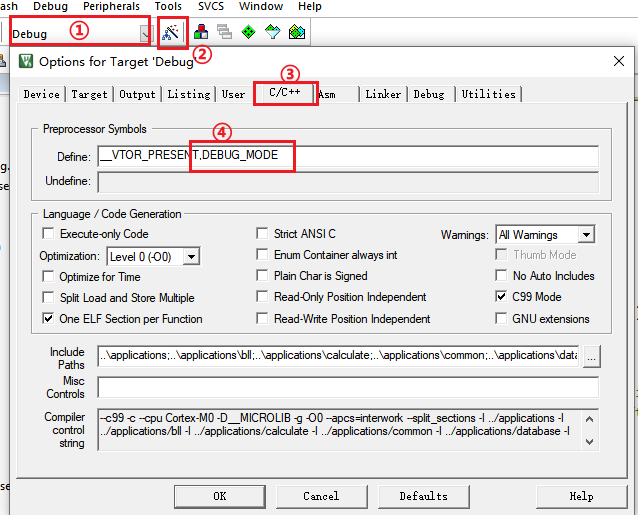
image-20231101005951301

批处理文件修改

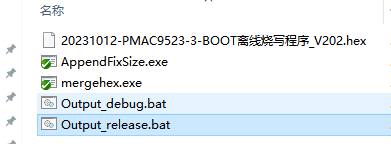
预付费表工程均通过批处理程序对生成的app与boot合成,并进行规范命名。刚刚对输出的路径进行了修改,还分别设置了运行文件Output_release.batOutput_debug.bat,所以还需要处理一下这两个文件

.\Prj\Output路径下找到批处理文件,修改好命名

image-20231101092331485

两处修改

  • 修改文件路径
  • Debug文件中修改生成的程序名:在前面添加(调试程序)提示

Output_release.bat文件内容如下

1
2
3
4
5
6
7
8
9
10
11
12
13
14
15
16
17
18
19
20
21
22
23
24
25
26
27
28
29
30
31
32
33
34
35
36
37
38
39
40
@echo off
echo %date%
echo %time%

set BootTarget=20231012-PMAC9523-3-BOOT离线烧写程序_V202

set Out=PMAC9523-3

set VERSION=V1.0.2R1348

set App=PMAC952x

set yy=%date:~2,2%
set mm=%date:~5,2%
set dd=%date:~8,2%

set results=%yy%%mm%%dd%-%Out%-主机离线烧写程序-%VERSION%

set update=%yy%%mm%%dd%-%Out%-主机在线升级程序-%VERSION%

cd Output\

del *主机*.hex

del PMAC*.bin

cd ..\Objects\release\

copy /y %App%.hex ..\..\Output\

cd ..\..\

copy /y %App%.bin Output\

cd Output\

mergehex.exe --merge %BootTarget%.hex %App%.hex --output %results%.hex

rename %App%.hex %update%.hex

Output_debug.bat文件内容如下

1
2
3
4
5
6
7
8
9
10
11
12
13
14
15
16
17
18
19
20
21
22
23
24
25
26
27
28
29
30
31
32
33
34
35
36
37
38
39
40
41
42
43
44
45
46
47
@echo off
echo %date%
echo %time%

rem 调试程序
rem 调试程序
rem 调试程序

set BootTarget=20231012-PMAC9523-3-BOOT离线烧写程序_V202

set Out=PMAC9523-3

set VERSION=V1.0.2R1348

set App=PMAC952x

set yy=%date:~2,2%
set mm=%date:~5,2%
set dd=%date:~8,2%

set results=(调试程序)%yy%%mm%%dd%-%Out%-主机离线烧写程序-%VERSION%
set update=(调试程序)%yy%%mm%%dd%-%Out%-主机在线升级程序-%VERSION%

rem 调试程序
rem 调试程序
rem 调试程序

cd Output\

del *主机*.hex

del PMAC*.bin

cd ..\Objects\debug\

copy /y %App%.hex ..\..\Output\

cd ..\..\

copy /y %App%.bin Output\

cd Output\

mergehex.exe --merge %BootTarget%.hex %App%.hex --output %results%.hex

rename %App%.hex %update%.hex

文件添加到工程

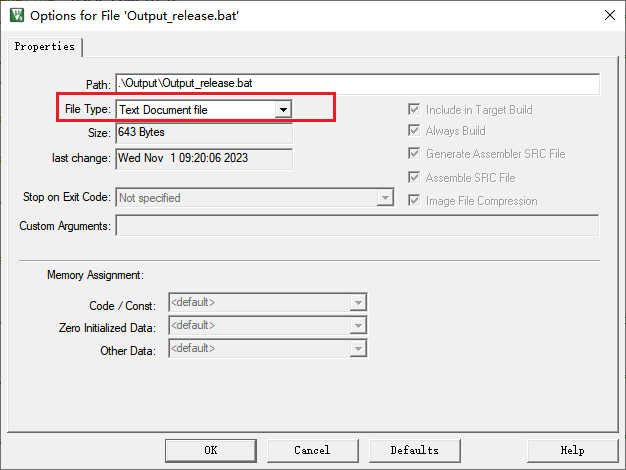
为方便修改批处理文件,将其添加到工程中,注意文件类型为Text Documer file
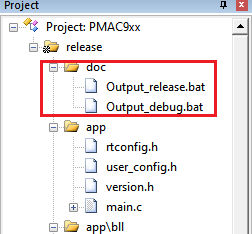
image-20231101092700905

image-20231101092716723

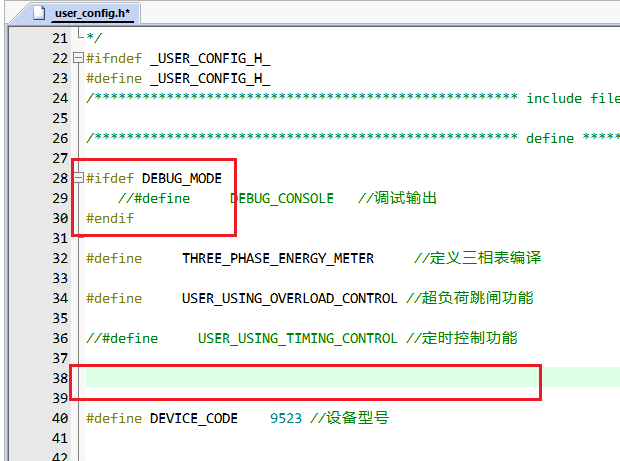
  1. 删除代码中的宏,不在代码中显示。对调试输出宏添加DEBUG模式限制

    image-20231101094211322

    image-20231101094223707

上传到版本管理工具

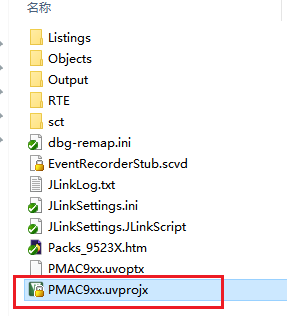
.uvprojx后缀的工程文件上传到版本管理工具

image-20231101095134406

最终效果

需要发布程序时在Release Target中编译,需要调试程序时切换到Debug Target即可。不再手动注释宏进行操作,避免忘记注释关闭看门狗宏的情况,保证看门狗是打开的。

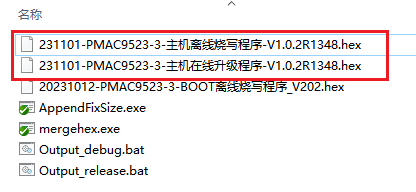
Release Target下,看门狗默认打开,生成的程序文件如下图
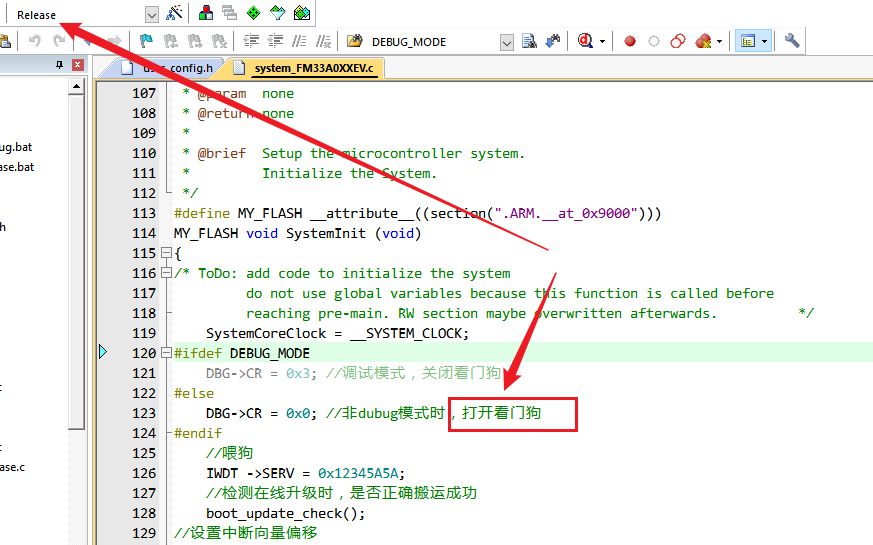
image-20231101094358601

image-20231101094503547

Debug Target下,看门狗默认关闭,生成的程序文件如下图,带有明显字样,清晰表示这是一个调试程序
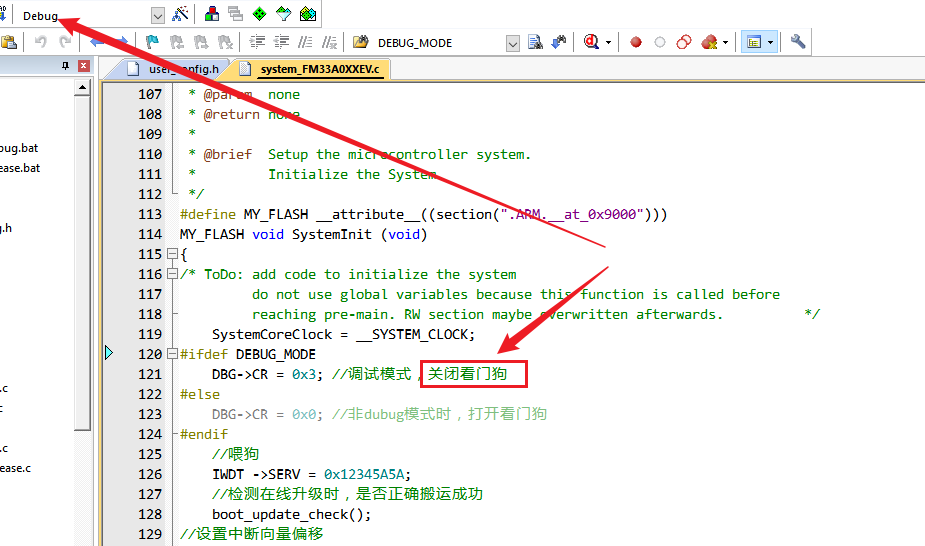
image-20231101094632125