S5P6818开发布置
WSL
安装
官方安装教程(很详细):https://docs.microsoft.com/zh-cn/windows/wsl/install-manual
管理员身份打开 PowerShell
1
dism.exe /online /enable-feature /featurename:Microsoft-Windows-Subsystem-Linux /all /norestart
重启电脑后,选择发行版,点击获取并安装
WSL 1安装完毕
建议安装 WSL1 版本即可,无需升级到版本 2
WSL1 与 WSL2 区别:https://docs.microsoft.com/zh-cn/windows/wsl/compare-versions
其他命令
WSL 版本查询
1 | wsl --list --verbose |
缩写:
1 | wsl -l -v |

设置默认版本(不影响已存在的发行版)
1 | wsl --set-default-version 1 |
设置 WSL 版本(Ubuntu 是我之前的 WSL ,具体名称根据实际情况填写)
1 | wsl --set-version Ubuntu 1 |
WSL 安装交叉编译工具
1 | sudo apt install gcc-10-arm-linux-gnueabi |
或
1 | sudo apt install gcc-arm-linux-gnueabi |

编译 c
1 | arm-linux-gnueabi-gcc-10 xxx.c -o xxx |
tftp32工具
tftp32官网:http://tftpd32.jounin.net
tftp32官方下载地址:https://bitbucket.org/phjounin/tftpd64/wiki/Download%20Tftpd64.md
安装后打开程序目录,编辑 tftpd32.ini 配置文件
BaseDirectory 填写你的共享目录(工程目录),LocalIP 本机ip地址,建议设置为静态IP
1 | BaseDirectory= D:\share |
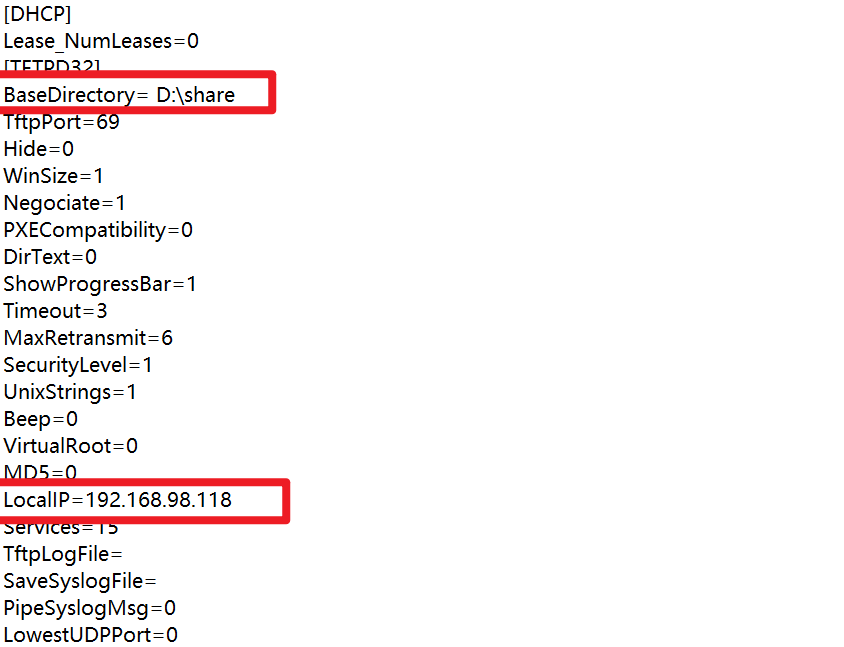
此时每次打开程序都是你配置的默认值
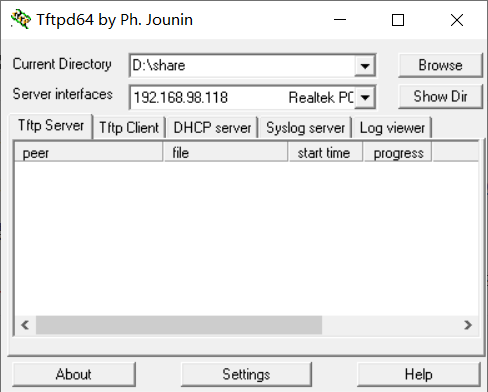
脚本
WSL
在 WSL 新建文件 build 创建编译脚本
路径需要修改为你的共享路径
1 | !/bin/bash --posix |
添加执行权限
1 | chmod 755 build |
添加自定义命令
方式一
添加文件链接
1 | sudo ln -sf /xxx/xxx/build /bin |
方式二
1 | sudo vim /etc/profile |
1 | #... |
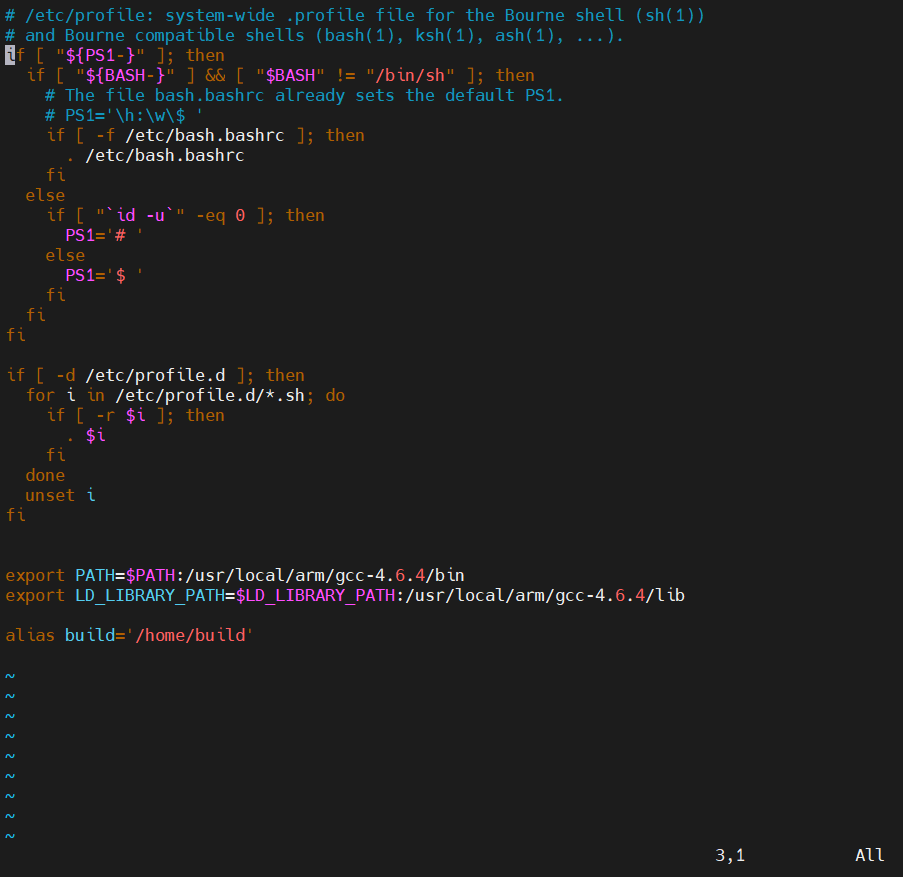
生效配置
1 | source /etc/profile |
开发版
新建文件 go
拉取文件并运行的脚本,需要修改为你的本机IP
1 | !/bin/sh --posix |
方式一
添加文件链接
1 | sudo ln -sf /xxx/xxx/go /bin |
方式二
在开发版,配置 /etc/profile 文件
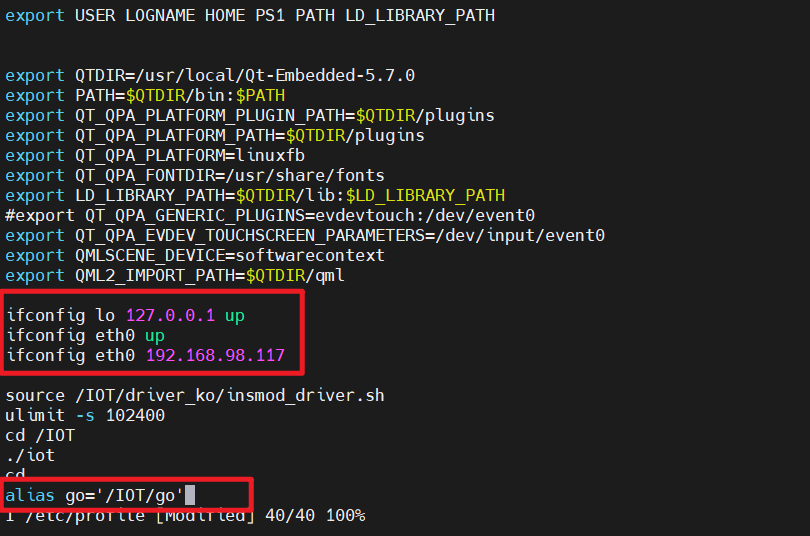
生效配置
1 | source /etc/profile |
开发流程
share 目录下编写程序,abc.c
WSL 运行脚本,将 abc.c 编译为 abc
1
build abc.c

运行tftp32工具
连接开发版,运行脚本,拉取并运行文件
1
go abc

自动编译已修改的文件
WSL 创建脚本,check
1 | !/bin/bash --posix |
同样创建文件链接或添加到 /etc/profile
1 | sudo ln -sf /xxx/xxx/check /bin |
1 | #... |
生效配置
1 | source /etc/profile |
监控share目录文件变化
1 | check xxx.c |
发生变化时,自动编译


